How to Install WordPress Theme with Demo in 5 Simple Steps
While designing a WordPress website, you should use a theme to give a perfect look to the website. Different WordPress themes come with various options and ready templates with demo information.
When the designer is working with the site layout, he/she can choose the demo content or add content manually. But that requires knowing how to install WordPress theme with demo.
After importing the demo content to the WordPress website, the user can replace them with actual data. It makes site designing easier. Also, you can maintain the exact layout you have seen on the theme’s demo page.
I will share the whole thing in a few simple steps in this post.
Steps to install WordPress theme with demo content
So, are you ready to install a WordPress theme to your website and import the demo content? Then follow the simple steps I have shared here.
Step 1: Install the WordPress theme
Did you already select a WordPress theme for your website? Otherwise, you can check the best WordPress themes and choose one based on your requirements. Here I am guessing you already have selected one. To make things easier, I am using the Digiquole multipurpose WordPress theme as an example.
To install the theme, go to your WordPress Dashboard > Appearance > Themes.
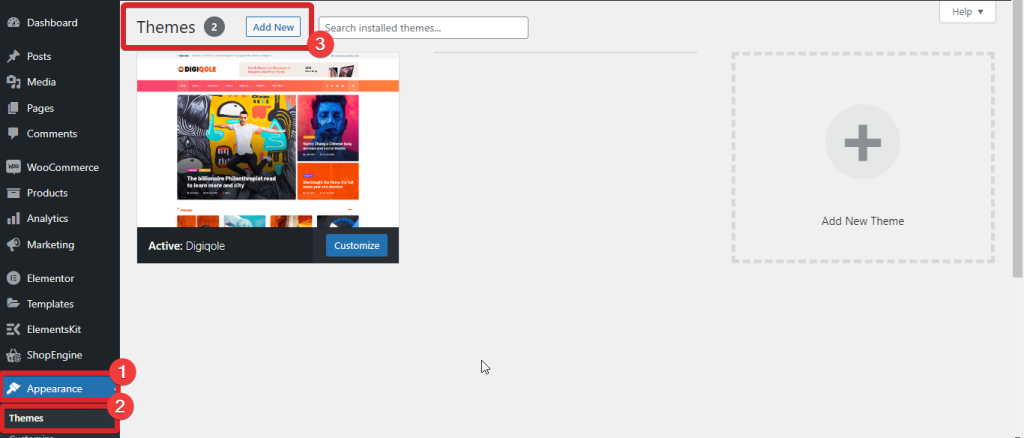
Now, select Add new to upload your theme. Choose the file in the zip format and activate it.
Step 2: Install the One-Click Demo Import plugin
After installing the WordPress theme, you are ready to bring the demo content for your website. There are two options to import the demo content — install the One-Click Demo WordPress plugin or use the default option of your installed theme.
However, most WordPress themes don’t come with any default import option. In such cases, the One-Click Demo WordPress plugin is the best solution. This plugin allows you to import the demo data with a single click. Moreover, you can use it for free.
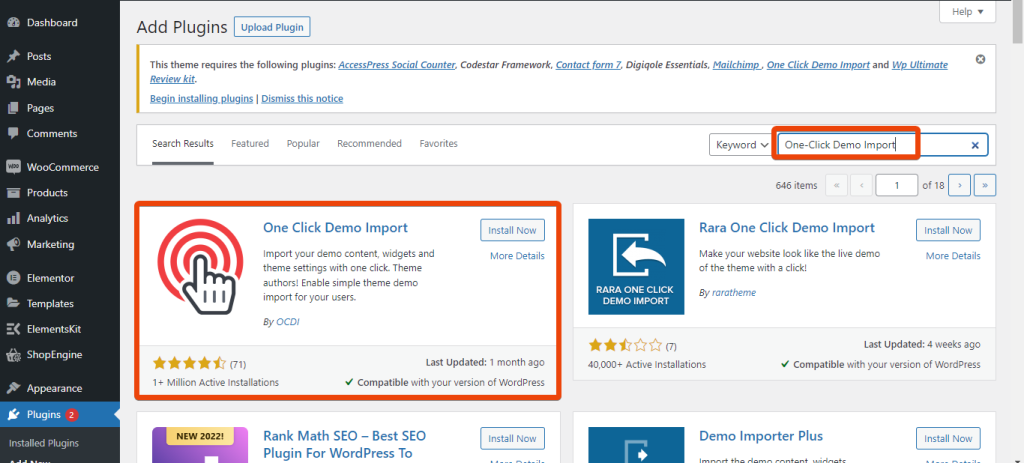
Go to your WordPress dashboard > Plugins > Add new. Now search for the One-Click Demo Import in the search box. It will appear in the list. Install the plugin and then activate it.
Step 3: Choose demo content to import
To explain the process clearly, here we are using the Digiquole News Magazine WordPress Theme. This theme comes with tons of demo content for various use cases. So, the user can choose which demo data he wants to import.
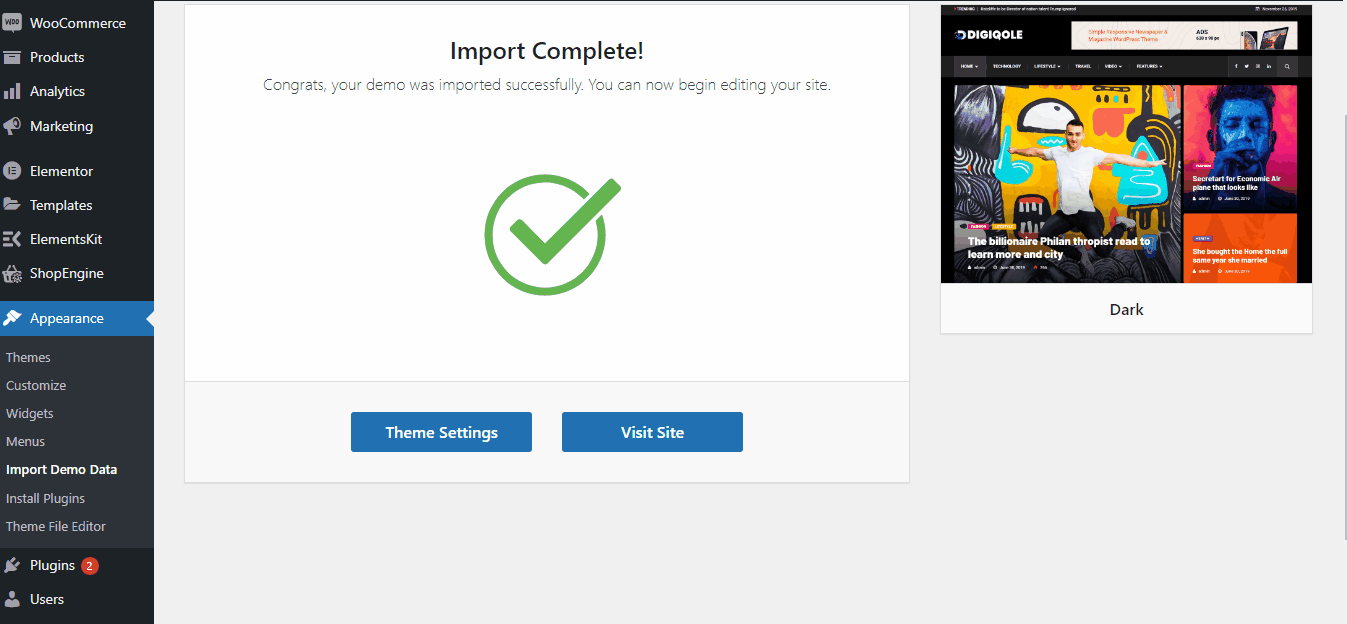
After installing the import plugin and the theme, you will see an option named ‘Import Demo Data’ under the Appearance tab. To import the demo data, go to Appearance > Import Demo Data.
As I show the process with the Digiquole theme, you will see two options — All demos and Multipage. Under the All demos options, the theme offers all the demo content for the theme. Choose demo data according to your need. After selecting the type of demo, click import, and it will begin importing the data.
It might take a few minutes to import your selected demo content. After importing the demo, it will show a message that the import is complete. Now you can visit the site to check how the demo content looks on your website.
Step 4: Replace the demo content
The primary goal of importing demo content is to look at the website like the demo. But the site owner must replace the demo content with the original content.
Though you might have imported the demo at once, replacing the demo content requires editing individual pages. However, it is not difficult to edit the pages. Just select the page you want to edit and replace the demo content.
Looking for the best WordPress blog themes? Check 👇👇
10 Best WordPress Themes for Blogs You Should Consider in 2022
With the Digiquole WordPress theme, you can easily replace the content using the Elementor page builder. It allows exploring more features and integrating new sections on the page without writing any code. You can use the WordPress Editor if you want.
Go to your WordPress dashboard > Pages and select the page you want to edit. Next, select ‘Edit with Elementor’ to edit the page and upload original content instead of demo content. For instance, I have chosen Homepage 1 to replace the demo content.
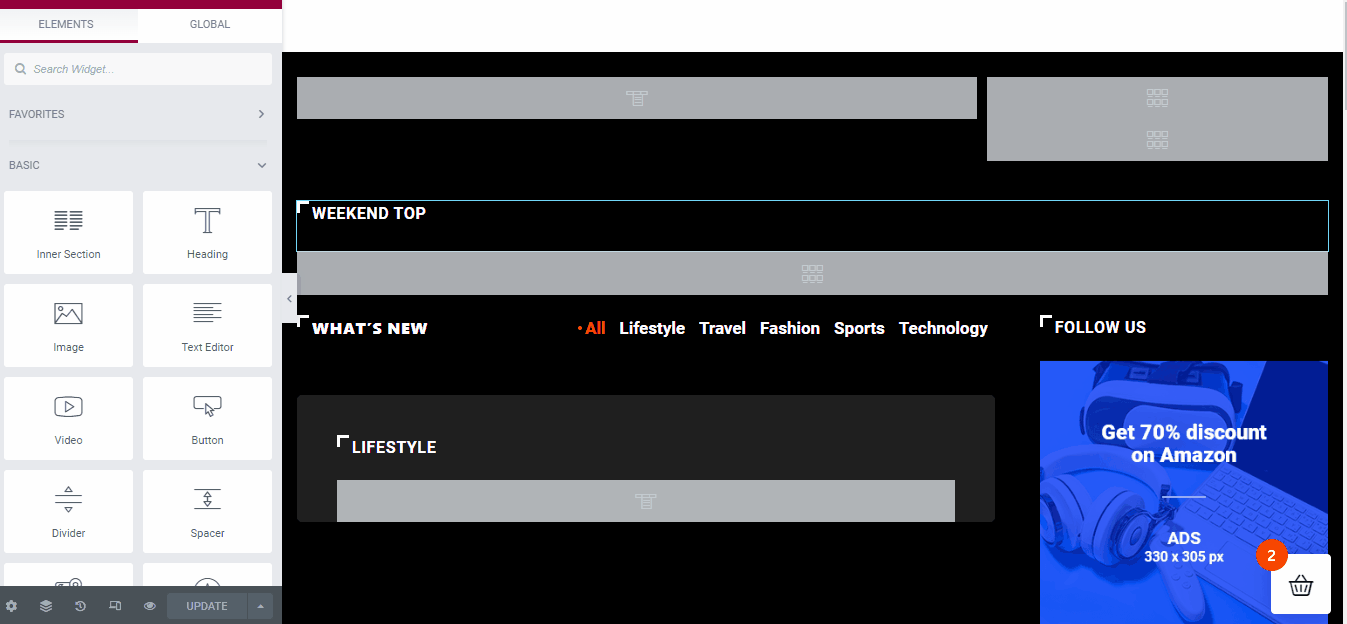
Once you select the page, choose ‘Edit with Elementor’, which will redirect you to the page editor. From the page editor, select any section that you want to edit. For example, on home page 1, there is a heading named Weekly top.
If you want to change the heading, click on the edit icon and change the title. For instance, I have given the header ‘Top Featured’. Like this section, you can edit any other demo content from the various pages.
Step 5: Customize the site’s layout
Installing a WordPress theme with a demo will give a particular outlook to the website by default. But that might not have everything you want or how you picture your website.
Customize the site’s layout by modifying different sections on the website. Once you find it looks perfect, you can publish the website.
Want to move your WordPress site to a new host? Check this out
Benefits of importing demo content in WordPress
Wondering why you should install WordPress theme with demo? There are several benefits of importing demo content to your WordPress website.
- The ready sections make it easy to design the website
- No need to create a page with different elements
- There won’t be a need to write any code
- Easy to replace the demo content with real
- No hassle in creating each page from the scratch
- Easy to check how a particular design will look on the live website
Wrap up
Finally, now you know how you can install WordPress theme with demo. Though I have shared a particular way to do this here, the process might vary for different WordPress themes. Whatever the method is, getting the demo content inside the WordPress site makes it easy to get an idea of how the theme will look on the website.
