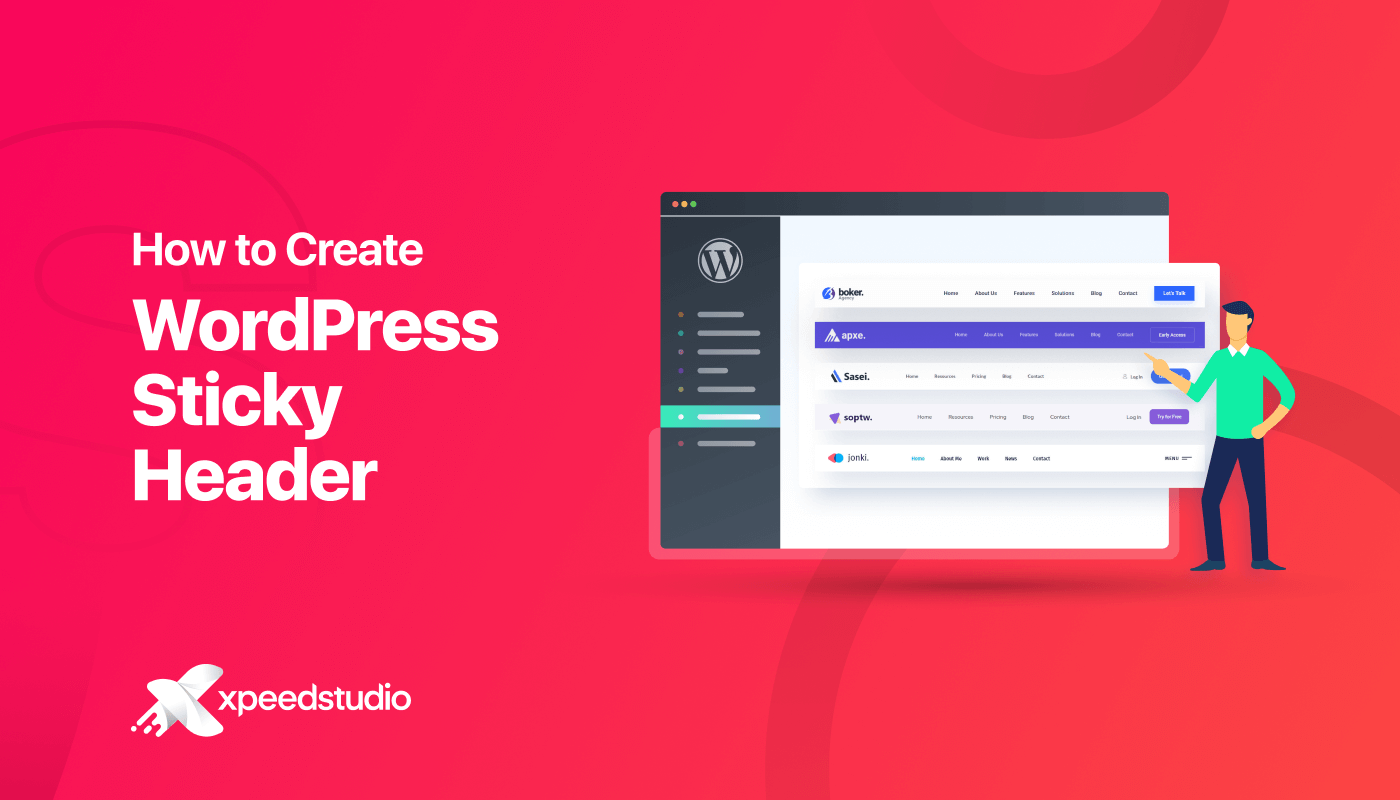
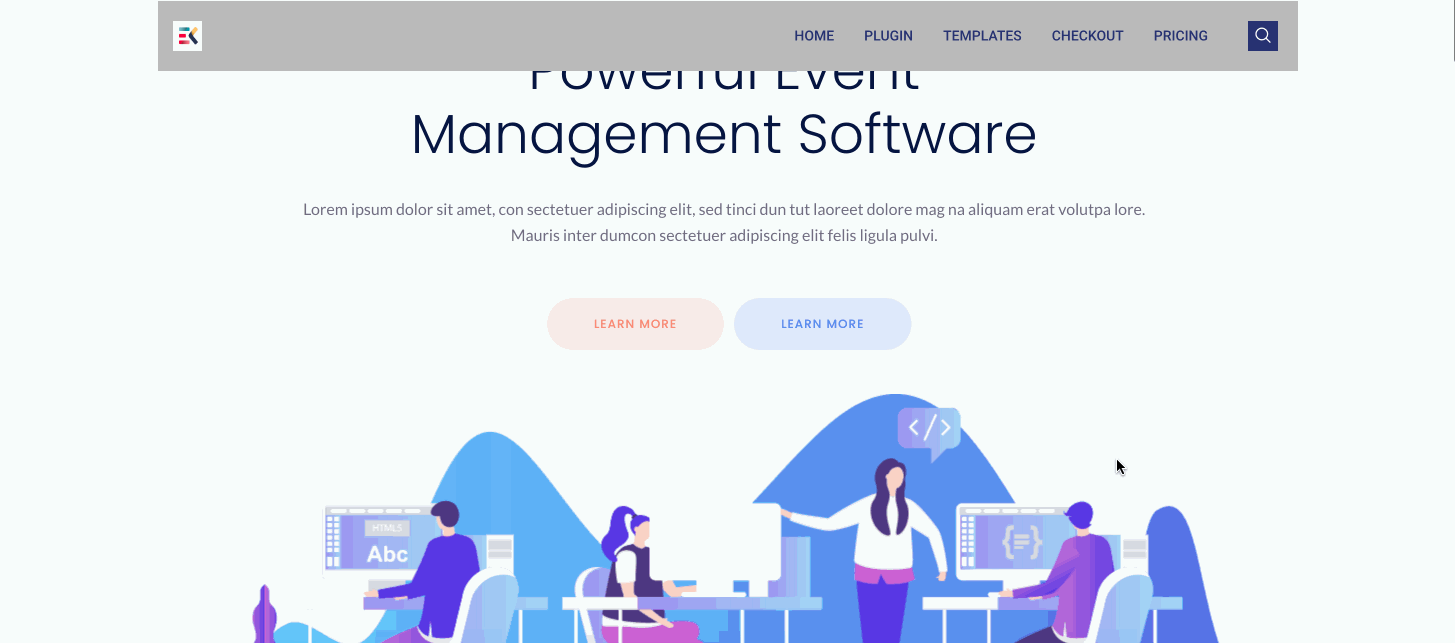
How to Create a WordPress Sticky Header (No-Code Guide)
User experience is all that matters to keep your website interactive and engaging. This is where the sticky effect in the website header plays a paramount role. It ensures your visitors can access the navigation menu whenever they need it by gluing it at the top of your WP site during scrolling.
Besides, the WordPress sticky header can revamp the overall site performance by positively impacting the bounce rate, average time, and other SEO factors. However, many of us still give less focus on this tactic while optimizing sites. The reason behind this might be not finding the right tool or method.
In this blog post, we’ll uncover the easiest method of giving a sticky effect to your WordPress header that won’t take more than a few minutes! So, stay with us till the end and learn how to boost your website performance effectively and effortlessly.
What is a Sticky Header?
A Sticky header means a navigation bar that remains fixed at the top of your website when you scroll down or up. It’s mainly built to ensure seamless navigation and provide better UX while scrolling your website.
Why Make Your Website Header Sticky?
Scrolling up all the time to access the navigation menu is super tiring. It not only deteriorates UX but also increases your site’s bounce rate. And you know what happens next — your overall site performance will be down!
This is where a sticky menu comes in handy. It’s used to optimize your website performance with a sticky navbar. Besides these, the sticky bar serves many more benefits. Here are the main advantages of adding a sticky menu:
- It makes your website more interactive by keeping the header sticky at the top of your website.
- A sticky menu boosts the average time on site through easy navigation that brings better SEO results.
- A sticky navbar is good for CRO (Conversion Rate Optimization) as your audience can access pages easily.
- It offers easy navigation on the pricing page that eventually boosts revenue.
- This decreases the bounce rate by improving your website’s UX.
- Brand-building opportunities increase by integrating a WP sticky header into your site and making the branding material (logo etc.) visible all the time.
Prerequisites Before Creating a WordPress Sticky Header
Since you have learned about the underlying benefits of adding a WordPress sticky header menu, it’s high time to start showcasing it on your WordPress site. But do you know how?
No, worries. Here we will reveal the easiest method of displaying the WordPress sticky navbar. But before that, you will require a few plugins for adding a sticky menu:
- Elementor (Free).
- ElementsKit (Free & Pro).
How to Create a Sticky Header in WordPress
This tutorial will guide you on how to create a website sticky header in WordPress with Elementor from scratch without coding. It means from creating a nav menu to setting up the sticky conditions, it will walk you through everything. So, let’s get started with adding an Elementor sticky menu in WP using ElementsKit:
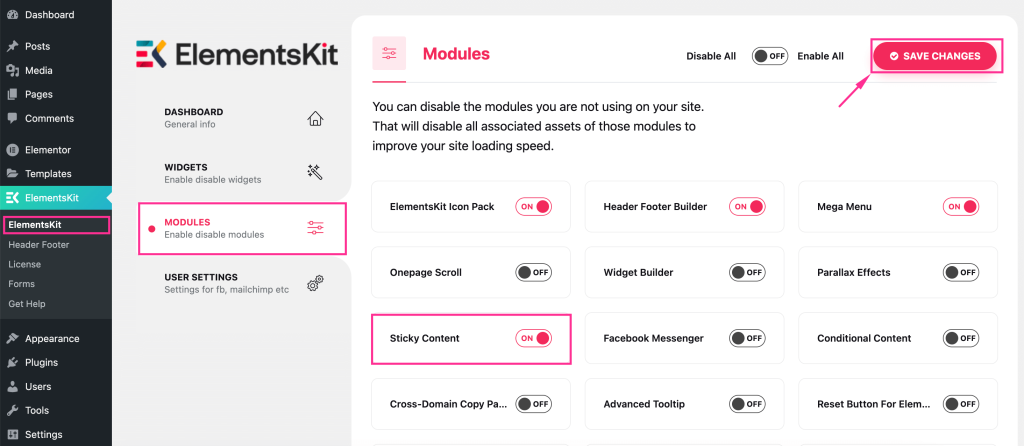
Step 1: Enable the “Sticky Content” Module.
After installing the required plugins, go to your admin panel and navigate ElementsKit >> Modules to enable the sticky header. Then enable the “Sticky Content” module and hit the “Save Changes” button.
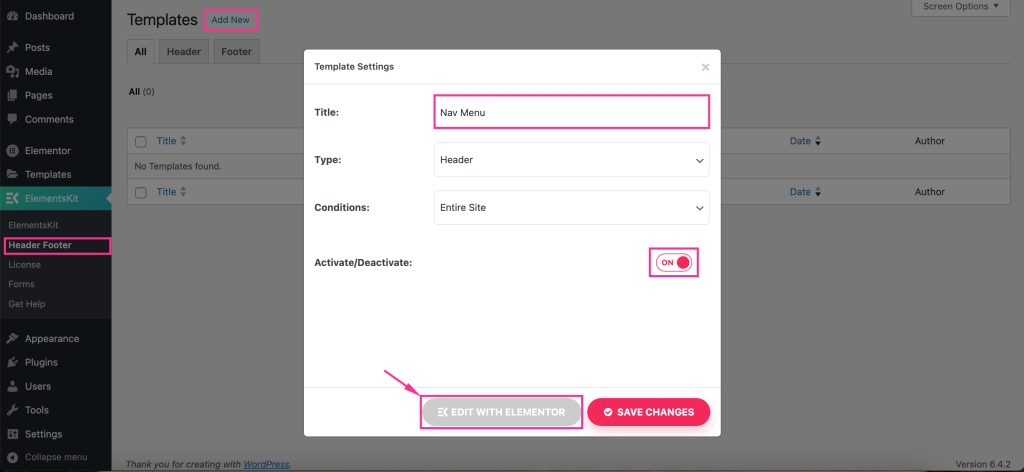
Step 2: Create a Website Sticky Header with Built-in Templates.
In the second step, you have to add a header. You can create it manually or any way you want, but the fastest and easiest method will be using ElementsKit’s pre-built header templates.
To add a header using ElementsKit, go to the Header and Footer tab of ElementsKit and press the “Add New” button. This will pop up a tab where you need to fill in the following fields:
- Title: Add a suitable title for your header such as the nav menu.
- Type: Select header.
- Conditions: Set conditions for your header.
- Activate/ Deactivate: Make this Elementor sticky menu active.
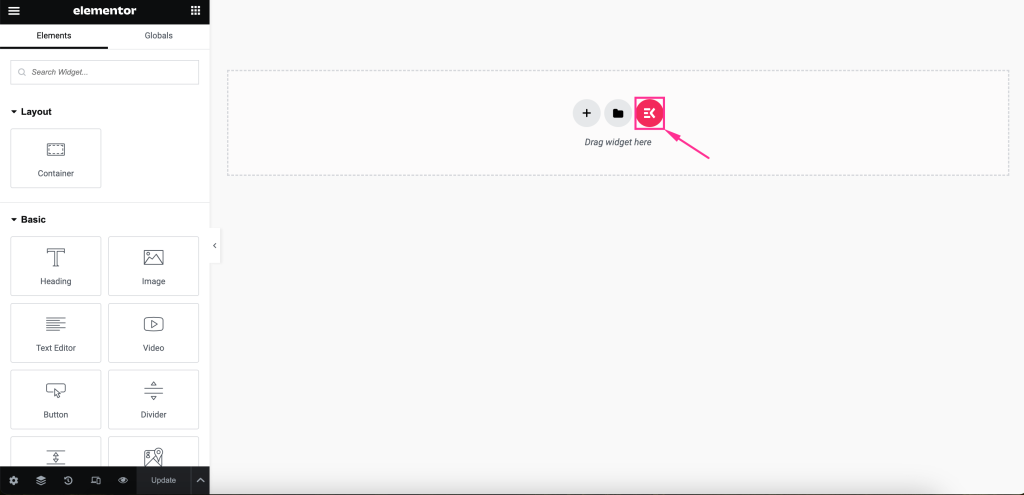
After that, hit the “Edit with Elementor” button to select a fixed website built-in header template.
This will redirect you to the Elementor editor where you have to hit the “Ekit” icon to access ElementsKit’s template library.
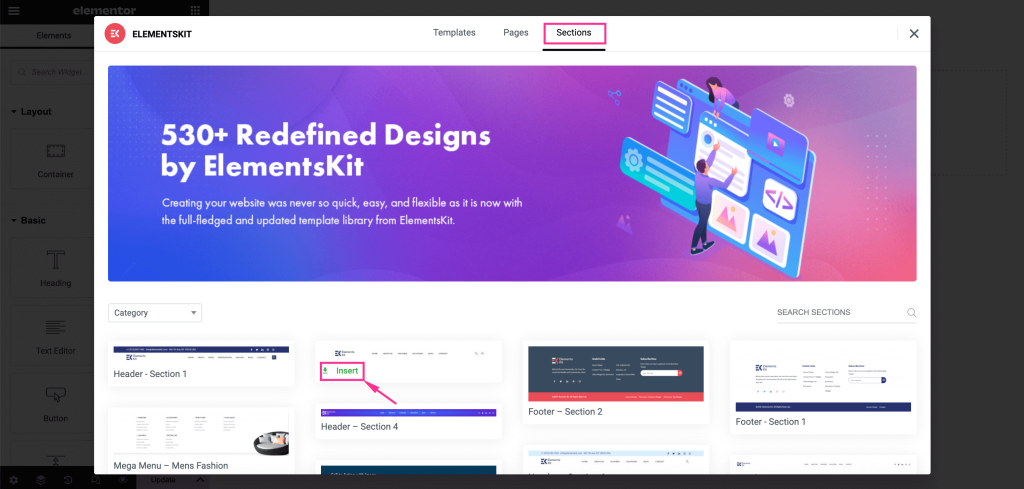
It will open up a template library tab. There, you need to go to the “Sections” tab and select a suitable fixed website header template by pressing the “Insert” button.
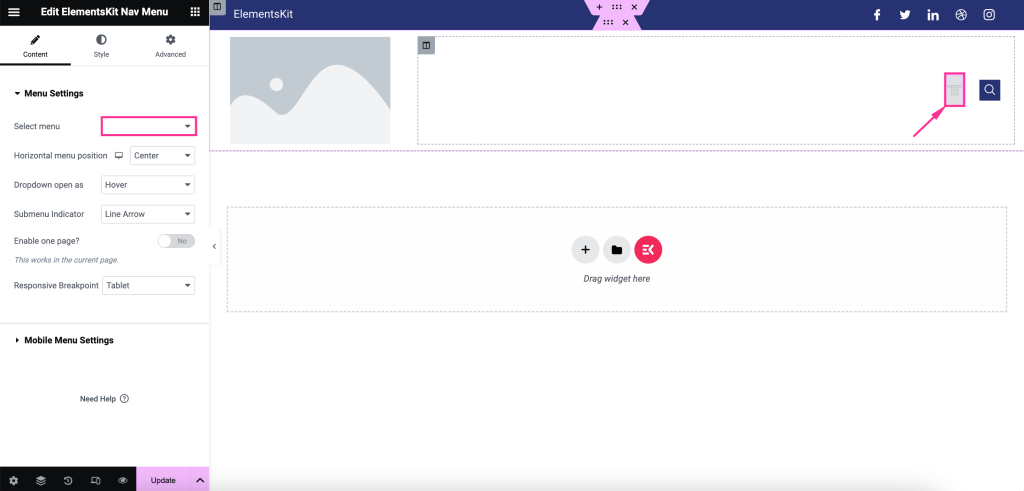
After that, press the menu icon and select which menu you want to show from the left side. Besides, you can adjust the following menu settings, such as:
- Horizontal menu position: Set Elementor sticky menu position from right, left, center, and justified.
- Dropdown open as: Select whether you want to show the dropdown menu on hover or click.
- Submenu indicator: Choose a submenu indicator icon that will be displayed with the header nav menu.
- Enable one page: Enable it if you want to show a WP sticky header on one page.
- Responsive breakpoint: Make it responsive for tablets or mobiles.
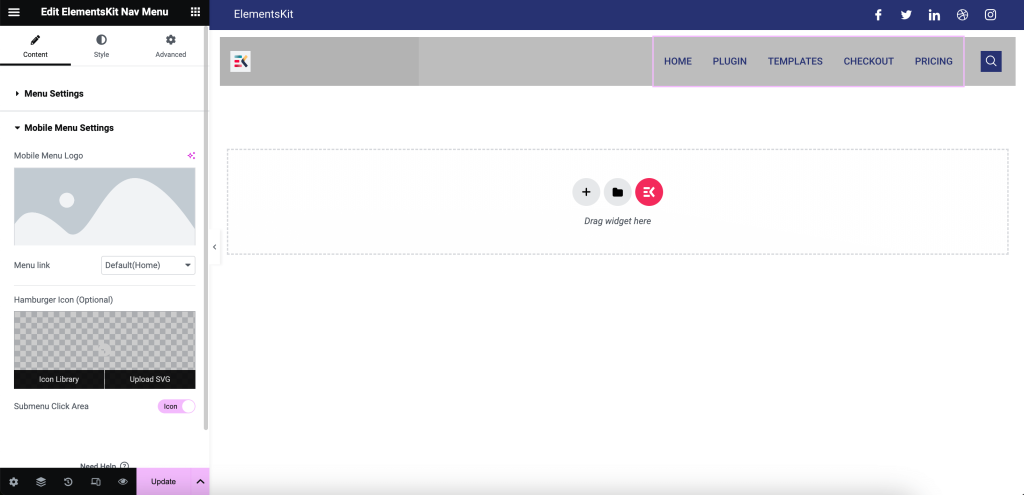
Additionally, you can edit the following WordPress mobile menu settings:
- Mobile Menu Logo: Insert an icon from your media library.
- Mobile Link: You can add a custom link to the menu or make it default.
- Hamburger Icon (Optional): If you want, choose an icon for the icon library.
- Submenu Click Area: Enable it, if your menu has a submenu and you want to add an icon to it.
After the content, edit the WordPress menu style by customizing the Main Wrapper, Menu Item Style, Submenu Item Style, Submenu Panel Style, Hamburger Style, and Mobile Menu Logo.
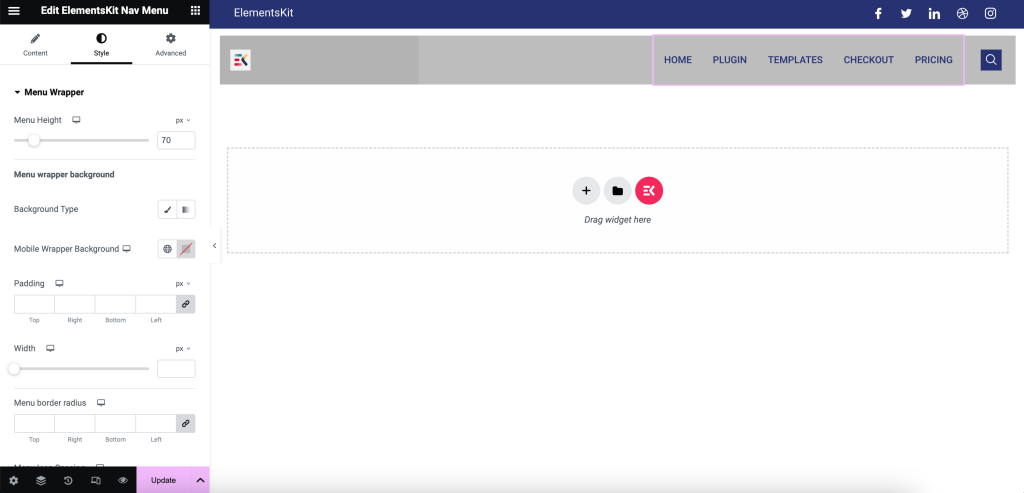
Now, press the “Image” icon and add an image from your media library or device. Then, adjust the Image Resolution, Alignment, Caption, and Link.

You need to also alter the Image Width, Max Width, Height, Opacity, CSS Filters, Border Type, Border Radius, and Box Shadow.

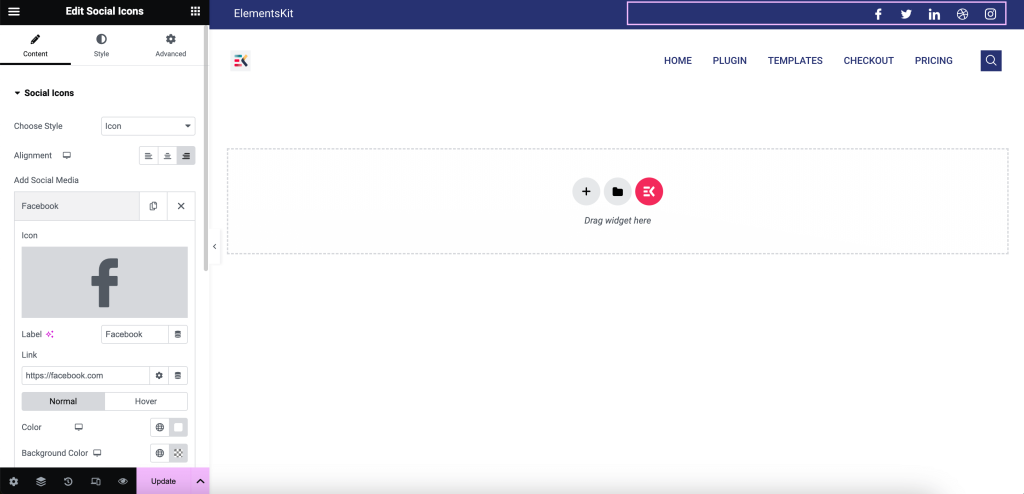
Then add social platforms and customize them according to your desire by clicking on them. All the customization options will be visible on the left side after pressing the social profile fields.
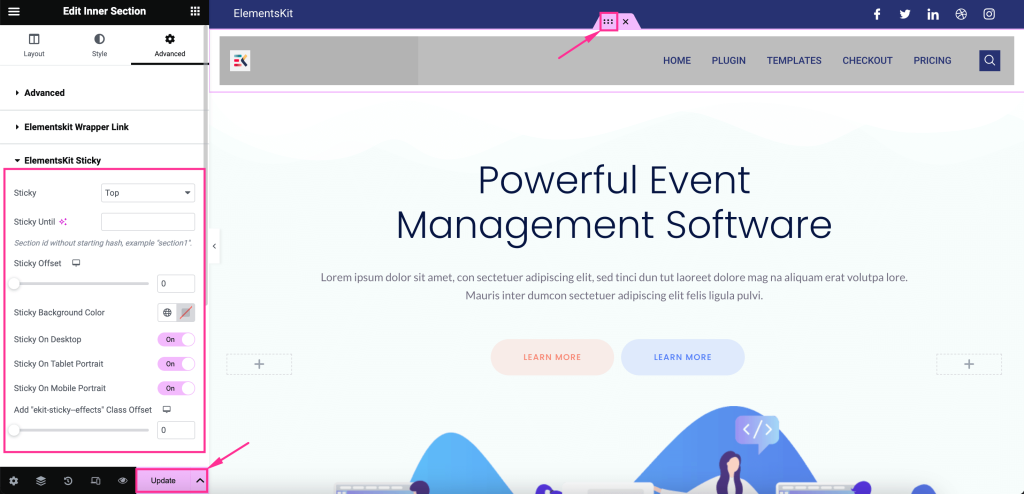
Now, it’s time to take the final move to make your header menu sticky. To do that, click the dot section settings of the header menu and expand the ElementsKit Sticky from the Advanced tab. This will show up in more settings like:
- Sticky: Set the condition of your sticky content from top, bottom, column, and show on scroll-up options.
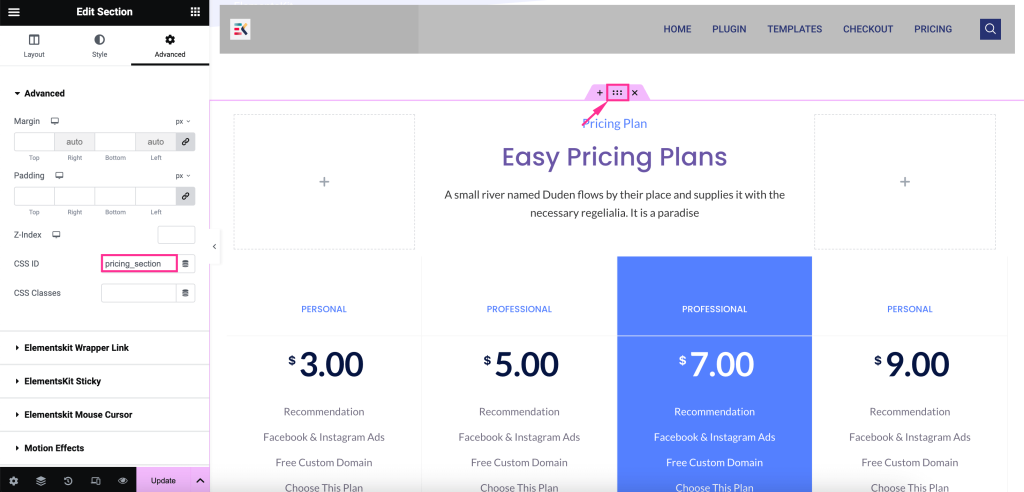
- Sticky Until: This feature allows you to display a WordPress sticky header menu till a selected section by entering a CSS ID. Now to generate a CSS ID, click on the dot option till where you want to make the header sticky and enter a CSS ID under the Advanced tab like the added image. Then, copy the CSS ID and paste it on this Sticky Until field. Thus after updating your WordPress sticky header menu will be displayed till that section. Here we’re making the header sticky till the pricing table.
- Sticky Offset: Adjust this field.
- Sticky Background Color: Set the color for the background of your sticky header.
- Sticky on Desktop: Enable this option to show the menu sticky when someone visits your website using desktop devices.
- Sticky on Tablet Portrait: Set it to active mode to view the Elementor sticky menu on tablets.
- Sticky on Mobile Portrait: Make the header sticky by enabling the button.
Finally, adjusting all the options, hit to live your sticky menu on WordPress.
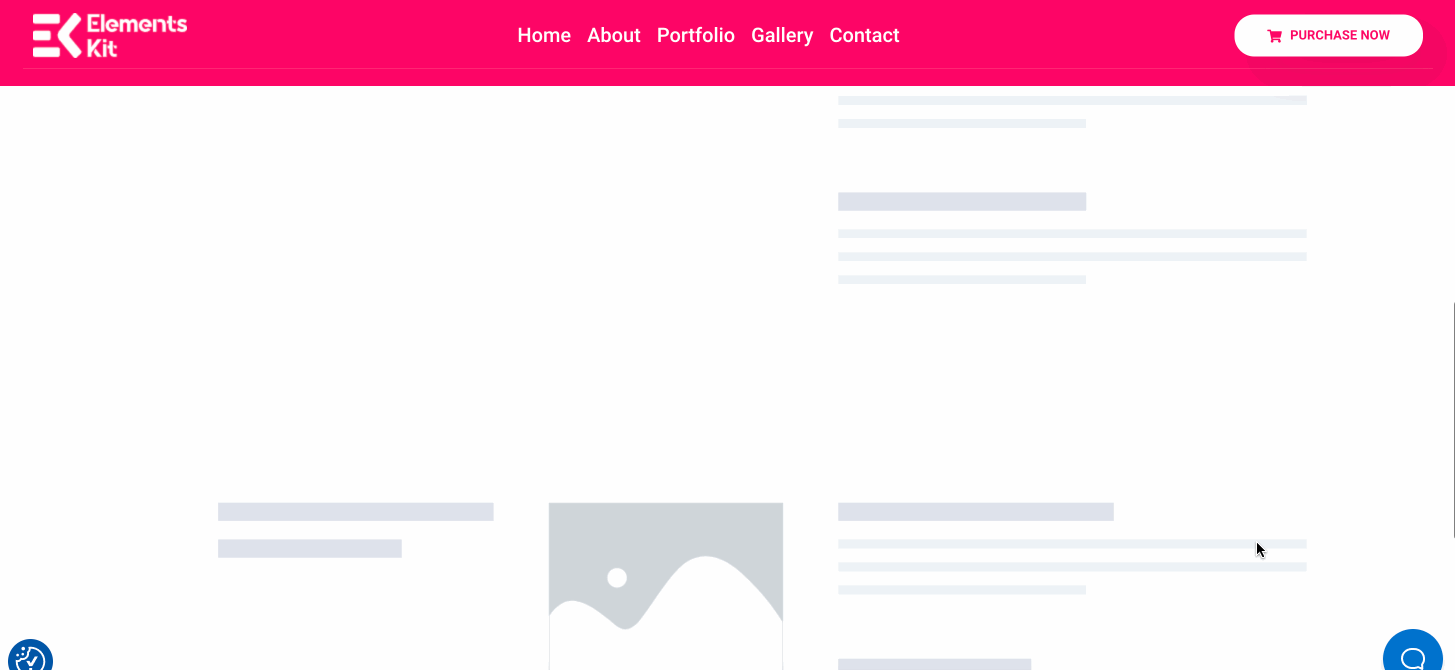
Step 3: Make a WordPress Sticky Menu.
Now let’s preview your created header menu and check how it looks on the front end.
Do you need more help regarding adding a sticky effect to your WordPress header menu? Check out this tutorial to get a detailed guide on this 👇:
Why is WordPress Sticky Header not Working?
Your WordPress sticky header might not work for several reasons. One main reason can be a conflict with other plugins. Besides, due to issues like WordPress installations, browser cookies, and cache your WordPress sticky header might not work.
Wrapping up
Since you learned how to display a WordPress sticky header menu, it’s your turn to implement it. Because as soon as you utilize this sticky header on your website, you will be able to avail the opportunities for greater benefits.
From better user interaction to improved site performance, it will influence everything. So, try this newfound strategy and boost your website growth with a smooth and accessible WordPress sticky navigation bar.

