How to Add Countdown Timer in Gutenberg WordPress Site
A countdown timer in Gutenberg is a timer block you can add to WordPress pages with the use of a plugin like GutenKit. It is used to highlight time-ticking bomb sales, launches, and limited offers.
Countdown timer urges visitors to take immediate action. It can increase conversions by more than 30% during special and time-sensitive offers. With Gutenberg + GutenKit, you can drop a countdown timer, customize how it should look, and place it on your page without coding.
This guide will show you how to add countdown timer in Gutenberg and make your audience feel that exciting “Buy it before you lose it!” vibe.
Quick Overview
Adding a countdown timer in Gutenberg is an effective way to create urgency and boost conversions on your WordPress site.
Tool Used: GutenKit
Steps to do:
1. Install and enable GutenKit plugin.
2. Add the countdown timer block (first method).
3. Add the countdown timer template (second method).
4. Customize countdown timer.
5. Preview and publish.
When to Add a Countdown Timer in Gutenberg?
Countdown timers are incredibly versatile and can be used in a variety of scenarios. Here are some of the most common use cases:
- Flash Sales and Limited-Time Offers: Encourage visitors to buy before the deal ends.
- Event or Webinar Launches: Build anticipation for an upcoming event.
- Coming Soon Pages: Show visitors when your website, feature, or product will go live.
- Holiday Promotions: Perfect for Black Friday, Cyber Monday, or festive campaigns.
- Product Launch Countdowns: Create buzz around new product releases.
Adding a countdown timer at the right time can make the difference between an interested visitor and a paying customer. Plus, you’ll create FOMO (fear-of-missing-out) among your visitors, thus increasing engagement.
How to Add Countdown Timer in Gutenberg
Before we dive in, let’s make sure everything’s ready.
Pre-requisites
To follow along, you’ll need:
- A WordPress website using the Gutenberg block editor.
- The GutenKit plugin installed and activated.
If you haven’t installed GutenKit yet, you can easily find it by searching for it in your WordPress dashboard under Plugins → Add New. Install it and activate it to experience its amazing features, including countdown timer.
Enable Countdown Timer Block
After installing GutenKit, go to your WordPress Dashboard → GutenKit → Blocks Manager. Here, you’ll find a list of all available blocks that come with the plugin. Locate the Countdown Timer block and make sure it’s toggled on.
This ensures the block will be available when you edit your pages or posts. Now, there are 2 ways to add a countdown timer to your WordPress Gutenberg. One is through a block, and the other is through a template.
Method 1: Add Countdown Timer in Gutenberg Using Countdown Timer Block
You can add a countdown timer on a page or even on a post. In this tutorial, we’ll add a countdown on a landing page. You can choose any page where you want to add your countdown timer.
Step 1: Open a Page/Post
Next, go to pages and open all pages. Find your landing page and click Edit to launch the Gutenberg editor.
Once inside the editor, you’re ready to add your countdown timer.
Step 2: Add Countdown Timer Block
This method is considered slightly laborious because you’ll need to set up a new container where you want to display your countdown timer. This method also requires some blocks to create a whole section of a countdown timer, like a Text block.
First, find the perfect location for your countdown timer on your page.
Add a container and click on the plus icon (+) icon inside the container to add the countdown timer.

Search for the countdown timer block and click it to insert it into your page. Now, the countdown timer that’ll be inserted in your page is the default one.
Step 3: Customize Countdown Timer Block
You can customize it using the Gutenberg panel on the right side of your screen. You can select the style of your countdown timer from circle, box, flip, etc. Then set up your timer settings, as to when the countdown will end. Lastly, add expire action so that the visitors will know that the deal has ended and to prevent them from confusion.

Now, style tab allows you to enhance its appearance by changing the color of the digits and label. You can also add background color and adjust the border.

Additionally, you can elevate the look of your countdown timer even its whole section by going through the advance settings tab. You can add background color, set an animation effect, etc.

Method 2: Add Countdown timer in Gutenberg Using a Template
However, using a default countdown timer is a bit boring, and it requires a lot of styling.
So, here’s the great trick here. Instead of using the default one, why not use a ready-made template?
Step 1: Select and Import Countdown Timer Style
GutenKit offers several pre-designed countdown timer styles you can choose from. Personally, I loved how sleek and modern they looked, no need for custom coding or CSS tweaks. No need to add many containers and blocks just to create a whole section of a countdown timer.
Simply find and click the GutenKit template library at the top of your block editor. You’ll be directed to various amazing options.
Decide on your preferred design and insert it into your page. Within seconds, the timer appears beautifully on your block editor.
Step 2: Customize your Countdown Timer
This is where the fun begins!
GutenKit gives you full control over how your countdown timer looks and behaves. You can customize:
- End Date & Time: Set when the countdown should end.
- Labels: Edit text for days, hours, minutes, and seconds.
- Alignment: Center, left, or right-align your timer.
- Colors & Typography: Match your site’s branding perfectly.
- Animations: Add subtle motion to catch attention.
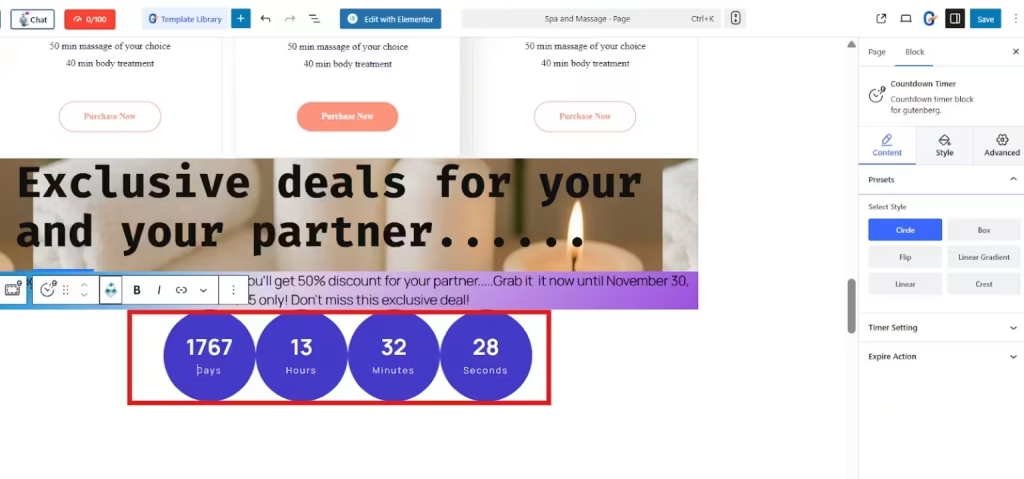
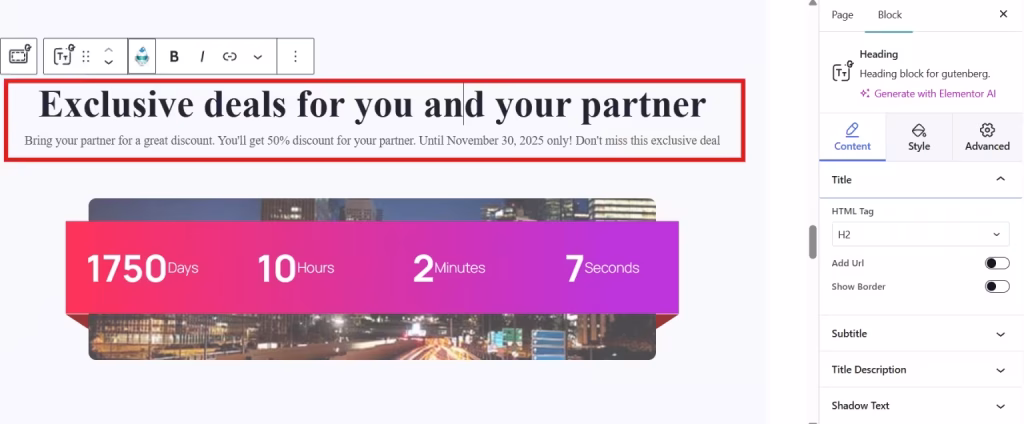
So, start with changing the texts in your section, including the title and description. You can select the perfect font style to match your site’s theme.
You can also adjust the background of the section by going through the style settings. You can adjust the color of its background or choose an image or a video as a background.

Now, let’s customize the countdown timer, starting with selecting the style. You can choose from Circle, Flip, Linear, Box, Linear Gradient, and crest depending on your choice of style.
Set the timer settings by defining the due date and time of your countdown timer. For example, the exclusive deal is only valid until Nov 30, 2025.

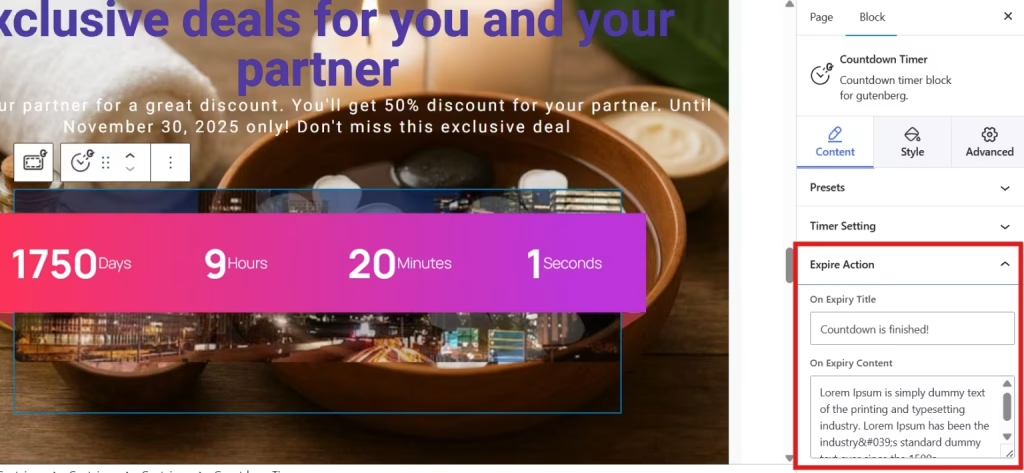
Then what will happen if your countdown timer reaches the due date? Add a custom message so that when the deal or offer has ended, customers will know that it has ended to avoid misleading. This also ensures that your system is functioning well.
To add a custom message, simply go to the Expire Action and enter the expiry title. For example, “Your Time is Up!” or “Great Deal is Over, Stay Tuned!” Also, you may add a short content about the exclusive deal.
Of course! You can still elevate the look of your countdown timer to match the theme of your website through the style settings. You can:
- Adjust the content’s height.
- Set the typography style, color, and even add a background to days, hours, minutes, and seconds.
Step 3: Test your Countdown Timer in Live
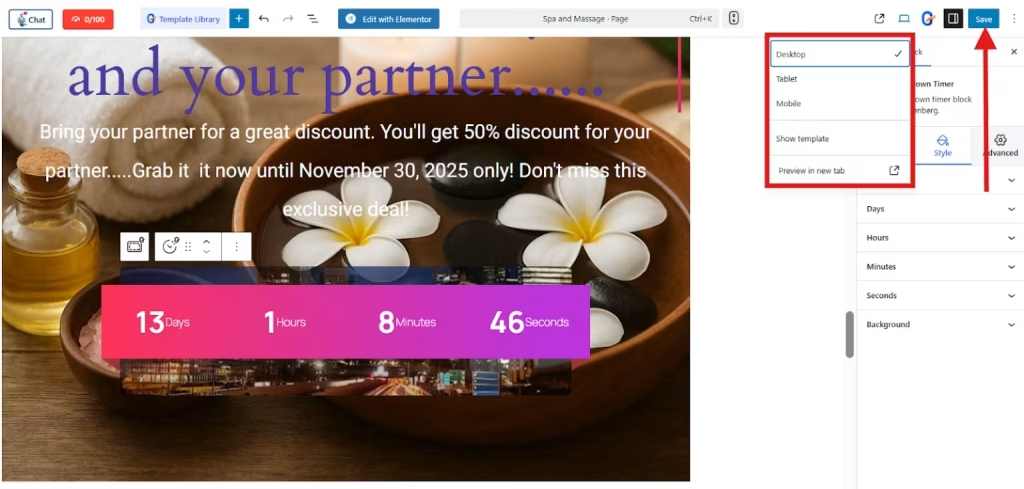
Once you’ve finished customizing, click Preview → Preview in New Tab to see how it looks on your live page whether you are using a Gutenberg block or a template.
Make sure:
- The timer counts down correctly.
- The design looks great on both desktop and mobile.
- The end time is accurate (especially for time zone differences).
When everything looks perfect, hit save to live the changes you’ve made.
That’s it! Your countdown timer is now active on your WordPress site.

Why Creating Urgency in your WordPress Website is Important
In online marketing, urgency drives action. When people see a ticking clock, they instinctively feel the need to act fast, whether that’s making a purchase, signing up, or registering for an event.
Adding a countdown timer helps you:
- Boost conversions by encouraging quicker decisions.
- Enhance engagement through interactive visual elements.
- Highlight special deals without cluttering your site with banners or pop-ups.
So, why is GutenKit the best option?
I’ve tried several countdown timer plugins, but GutenKit stands out for a few key reasons:
- Native Gutenberg Experience: No need for shortcodes or custom scripts. Everything works directly inside the block editor.
- Beautiful, Pre-built Designs: Ready-to-use timer layouts that look professional right out of the box.
- Lightweight and Fast: Doesn’t slow down your site like some heavy builder plugins.
- Extremely Customizable: From styling to timing logic, every element can be tailored.
- All-in-One Solution: Beyond countdowns, GutenKit includes tons of powerful Gutenberg blocks for headers, buttons, testimonials, and more.
If you’re serious about elevating your WordPress design while keeping your site lightweight and block-based, GutenKit is a must-have.
FAQs
1. Can you use GutenKit Countdown Timer on any theme?
Yes! GutenKit works seamlessly with all WordPress themes that support Gutenberg.
2. Can you display multiple countdown timers on one page?
Absolutely. You can add multiple countdown blocks, each with its own settings and end times.
3. Will the countdown timer work on mobile devices?
Yes, GutenKit’s countdown timer is fully responsive and looks stunning on all screen sizes.
4. Can you style the countdown timer without coding?
Absolutely yes! GutenKit provides easy styling controls for color, typography, spacing, and more directly in the block settings.
5. What happens when the timer reaches zero?
You can show a custom message.
Time to Take Action
Adding a countdown timer in Gutenberg doesn’t have to be complicated. The process is so easy, especially with GutenKit. It’s fast, intuitive, and gives your website that extra push to drive more conversions.
If you haven’t already, go ahead and install GutenKit today. Start creating engaging, urgency-driven pages that convert visitors into customers.
One countdown at a time!
